If you’ve just got a new pool or you’re looking at upgrading your old one, the swimming pool plumbing diagram can look like a bit of a maze. Pipes going everywhere, boxes with strange names, arrows pointing in all directions—it’s a lot to take in. But don’t worry, you don’t need to be a plumber to get the basics. In this guide, we’ll break down what all those lines and labels mean, especially for Aussie homeowners, so you can keep your pool running smoothly and avoid any big surprises.
Key Takeaways
- A swimming pool plumbing diagram shows how water moves through your pool system, including all pipes, pumps, and equipment.
- Knowing the main parts—like the pump, filter, valves, and heater—makes it easier to spot problems and talk to professionals.
- Pool plumbing can look different depending on if you have a concrete or fibreglass pool, or if it’s above-ground or in-ground.
- Australian laws have rules about pool plumbing, especially around safety and backflow prevention, so it’s important to follow them.
- Regular checks and basic maintenance can stop small issues from turning into expensive repairs, but don’t be afraid to call a pro if you’re unsure.
Decoding the Basics of a Swimming Pool Plumbing Diagram
Getting your head around a pool plumbing diagram might seem daunting at first glance, but it’s really just a map showing how water moves in and out of your pool. Understanding the fundamentals now will save you time and headaches later on, especially if you ever need to troubleshoot or update your setup. So, let’s break down the basics, bit by bit.
Key Components in a Pool Plumbing System
Your pool plumbing isn’t just a bunch of pipes stuck underground — each part serves a particular job. Usually, you’ll come across the following main features:
- Skimmer: This pulls water (and all that floating debris) from the pool’s surface into the plumbing system.
- Main Drain: Situated at the pool’s deepest point, this helps remove settled dirt by drawing water from the bottom.
- Return Jets: Once the water is filtered and treated, these jets send it back into the pool.
- Pump and Filter: The workhorses of your system, pumping water through and filtering out impurities.
Getting familiar with these components from the outset means you won’t be lost when it comes to future maintenance or expansion.
Understanding Flow Direction and Pipe Layouts
Flow direction in pool plumbing is just how water moves — out of the pool, through the cleaning and treatment equipment, and then back in. Diagrams use arrows for this, and most systems work in a loop:
- Water exits via the skimmer and main drain.
- Travels through pipes to the pump.
- Flows from pump to filter.
- Sometimes through a heater or chlorinator (if installed).
- Returns to the pool via return jets.
Table: Typical Pool Plumbing Flow Order
| Step | Part | Function |
|---|---|---|
| 1 | Skimmer/Drain | Pulls water out |
| 2 | Pump | Pushes water forward |
| 3 | Filter | Removes particles |
| 4 | Heater/Chlor. | Treats or heats water |
| 5 | ReturnJets | Brings water back |
Don’t forget, reading a diagram is mostly about following these lines and arrows — after a little practice, the patterns will make sense.
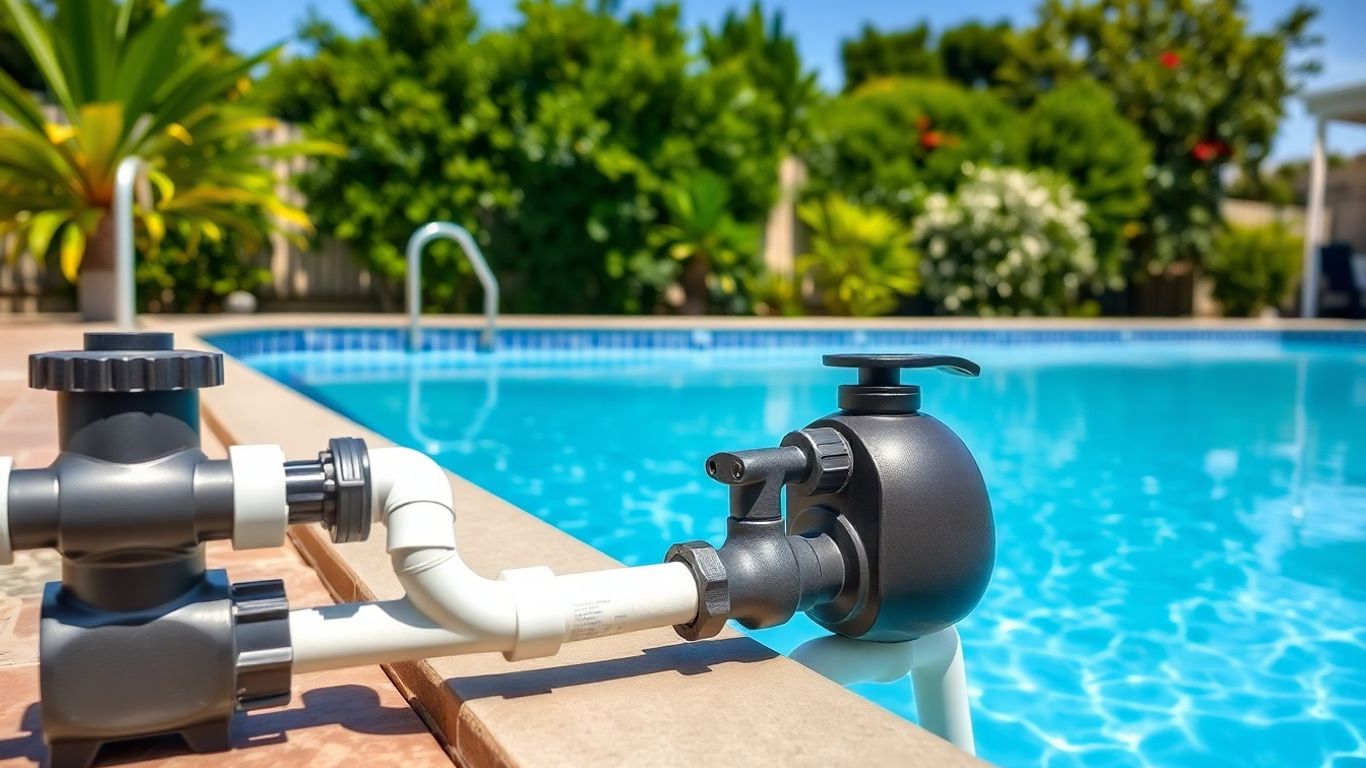
Typical Placement of Valves and Fittings
Valves and fittings are the switches and joiners in your plumbing. Their locations matter:
- Isolation Valves: Usually placed before and after equipment like pumps or filters for easy servicing.
- Multiport Valves: Mostly on sand filters, allowing backwashing or rinsing without fiddling with the pipes.
- Check Valves: Stops water flowing the wrong way, preventing issues when the pump stops.
These are all marked on a detailed diagram, which helps you plan repairs or upgrades down the track. If you ever need to cut off water flow or diagnose a tricky fault, knowing where these fittings are will make life simpler.
A clear understanding of placements and layouts could mean the difference between a quick fix and a full-blown plumbing drama next summer.
Essential Equipment Shown in Swimming Pool Plumbing Diagrams
When you look at a swimming pool plumbing diagram, you’re basically seeing the heart of the system. The equipment laid out in these plans is what keeps your water flowing, clean, and safe for swimming. Getting a handle on where each piece fits in makes troubleshooting, repairs, or upgrades a whole lot easier.
Pumps and Their Role in Water Circulation
Your pool pump is the starting point of the plumbing cycle. It pulls water from the pool through the skimmers, then pushes it onwards through various filters, heaters, and other features. The pump’s location is almost always at the beginning of the plumbing line, right after the skimmer and main drain lines combine.
- Pumps create the pressure that moves water throughout the system.
- Most Australian pools use self-priming centrifugal pumps with basket strainers.
- The pump’s horsepower should suit your pool size for best results and efficiency.
If your pump isn’t up to scratch, it’ll show in cloudy water, slow circulation, or rising energy bills.
Types of Pool Filters and Where They’re Installed
Filters are key for trapping debris, dirt, and even small bits of algae. After the pump, water goes through the filter to clear out unwanted stuff before it’s heated or chlorinated.
Common filter types and their placements:
| Filter Type | Usual Placement | Maintenance Frequency |
|---|---|---|
| Sand Filter | After pump, before heater/chlorinator | Backwash every 2 weeks |
| Cartridge Filter | After pump, before heater/chlorinator | Clean monthly |
| D.E. Filter | After pump, before heater/chlorinator | Backwash monthly |
A clear filter means your water looks good and stays that way. For more detail about filter maintenance and troubleshooting, here’s some practical advice on identifying and addressing common issues.
Chlorinators and Heaters in the Plumbing Line
Chlorinators—both salt and tablet types—usually sit at the end of the filtration chain, making sure only cleaned water gets sanitised. If your pool diagram includes an electric or gas heater, you’ll see it before the chlorinator. This order gives optimal heating and stops chemicals from wearing out the heater ahead of time.
- Saltwater chlorinators are becoming popular because they’re low effort and gentle on the skin.
- Heaters are optional but handy for extending your swimming season in southern parts of Australia.
- Always check your pool’s plumbing diagram to confirm the arrangement if you’re adding new equipment.
Keeping the layout correct helps avoid accidental damage and ensures everything runs smoothly for years to come.
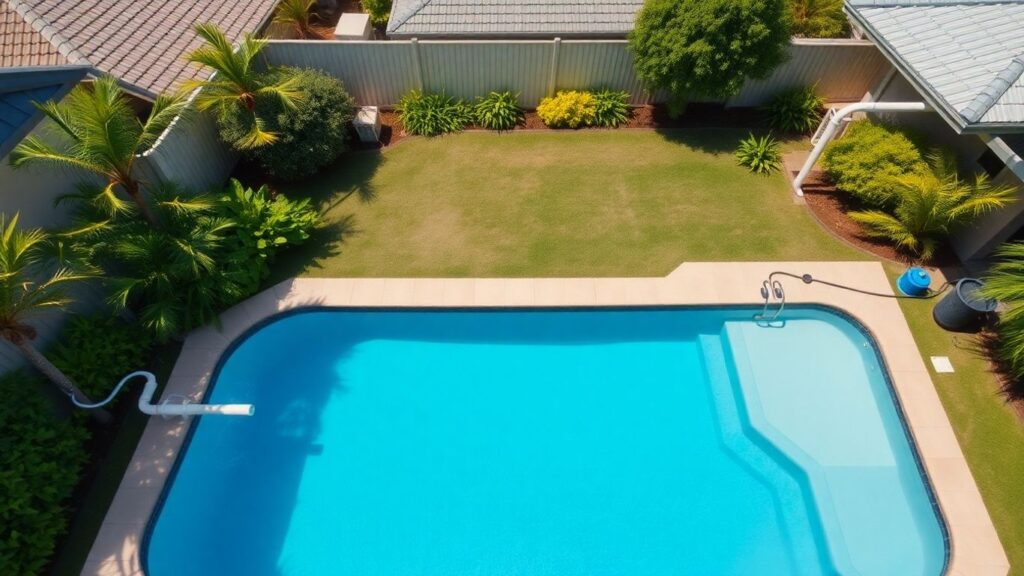
Plumbing Layouts for Different Pool Designs in Australia
No two pools have exactly the same plumbing layout. How your plumbing looks depends mostly on your pool’s construction type, whether it’s in-ground or above-ground, and the size and shape you pick. Let’s break down these differences so it all makes sense, whether you’re eyeing off a small backyard plunge pool or a big lap pool for the whole family.
Variations for Concrete vs Fibreglass Pools
- Concrete pools: The layout tends to be more customised. Pipes can be set into the structure itself. This lets you put in extra features like benches with jets or steps that have returns built in. If you want fancy stuff like spa jets or water features, the concrete makes it easier to add those from day one. Concrete pools often need more involved plumbing because you can pretty much design the pool any shape or depth you want.
- Fibreglass pools: Since these are made offsite and craned into the hole, the plumbing comes after the shell is set in the ground. You can’t change the shape much, so most layouts follow a simple loop – skimmer to pump to filter to return. Customisation is limited, but installation’s usually quicker and a bit neater.
- The choice between concrete and fibreglass doesn’t just affect plumbing flexibility; it also impacts the speed and cost of installation. Expert installation tips for both types can help you plan ahead.
Considerations for In-Ground and Above-Ground Systems
- In-ground pools: Buried pipe runs need to be carefully planned to avoid underground services and to fit in with the backyard layout. These pools often have more pipes overall, and most of the plumbing is hidden below ground, out of sight.
- Above-ground pools: Plumbing is usually more exposed. Flexible pipes can be used, and runs are shorter. Most above-ground systems stick with basic equipment – pump and filter, with maybe a heater if you’re lucky.
- Key things to double-check:
- Elevation – above-ground pools might need pumps placed lower than water level.
- Access – making sure there’s enough room to get at pumps and filters for servicing.
- Weather protection – exposed pipes might need insulation.
Impact of Pool Size and Shape on Plumbing
| Pool Size | Typical Plumbing Features | Extra Considerations |
|---|---|---|
| Small (≤6m x 3m) | Basic skimmer, return, single pump/filter | Minimal pipe runs, fewer fittings |
| Medium (8m x 4m) | May include more returns, possible heater | Dedicated circuits for features |
| Large (10m x 6m) | Multiple skimmers, returns, heater, jets | Complex loops, larger pumps/filters |
- Odd shapes (L-shaped, kidney-shaped, etc.) make plumbing trickier. Corners and curves add length to pipe runs which can affect pump size and flow rates.
- Extra features like spas or water features need extra pipes, valves and sometimes their own pumps – so layouts for pools with those bits will always look more complex.
When you’re working out your pool plumbing, keeping the layout as simple as possible can save on installation headaches down the track, but always allow for future upgrades or extra features you might want later.
Meeting Australian Standards and Local Regulations
Making sure your swimming pool plumbing is up to scratch in Australia isn’t just about common sense—it’s the law. Every step from planning to installation needs to sync with national standards and council rules. If you cut corners, you could end up facing fines, headaches with repairs down the track, or even worse, risks to your health and safety. Let’s look at what really matters.
Legal Requirements for Plumbing Installation
- Only licensed plumbers are allowed to carry out pool plumbing work in Australia.
- You must get council approval before any construction or major plumbing changes start.
- Every pool must be installed according to the Australian Standard AS 1926 for barriers and AS 3500 for plumbing.
- Proof of compliance and final inspection certificates will be needed before the pool can be used.
| Legal Requirement | Who’s Responsible | When It’s Needed |
|---|---|---|
| Building & Plumbing Permit | Homeowner / Pool Builder | Before construction begins |
| Licensed Plumber | Pool Owner | For all pipe installation/modification |
| Compliance Certificate | Licensed Plumber | After completion, before final use |
| Final Council Inspection | Council Inspector | Before pool is filled and used |
Backflow Prevention and Safety Measures
Every pool’s connection to mains water has to protect against backflow—a system where dirty water could sneak back into your household supply. There are strict steps to follow, and your plumber has to tick all these boxes:
- Fit a council-approved backflow prevention device at every mains connection.
- Schedule yearly testing to make sure the device is working.
- Register the backflow device with your local authority, who’ll likely send reminders for yearly checks.
Other key safety measures:
- Isolation valves clearly marked for quick shutoff.
- Anti-entrapment covers on pool outlets, especially for kids’ safety.
- Drainage that prevents flooding or water pooling around your home.
It’s always cheaper—and far less stressful—to sort out safety and compliance during the build. Retrofitting later can turn into a real wallet-buster.
Ensuring Compliance During Pool Construction
Staying on the right side of the rules takes some organisation:
- Contact your council before any digging or major plumbing work.
- Book all necessary inspections at key points: pre-plumbing, post-installation, and just before the final handover.
- Keep hold of all documents—permits, certifications, and drawings—as proof you followed the rules.
- If you’re not sure about something, talk to your council or a licensed pool plumber. They’ll save you time and prevent avoidable mistakes.
Failing to meet local and national standards can cause real delays and unexpected costs, so a bit of extra attention upfront makes the whole process smoother. Your pool will be safer, and you’ll avoid those annoying council headaches down the line.
Troubleshooting and Maintaining Your Pool Plumbing
Looking after your pool’s plumbing might seem a bit overwhelming, but with a handful of practical habits and some know-how, it’s pretty straightforward. If something goes pear-shaped, it’s better to know what you can tackle yourself before shelling out for a professional.
Common Plumbing Issues in Australian Pools
- Leaks: Pipes can crack due to ground movement, age, or tree roots. Watch for unexplained water loss or soggy patches around the pool.
- Blockages: Leaves, dirt, or even pool toys can lodge in pipes, cutting off water flow. You’ll notice the pump straining or not pulling water.
- Air in Lines: Bubbles returning to the pool or a noisy pump often means air is sneaking into the pipes, possibly through a loose fitting or cracked valve.
Don’t ignore little signs of trouble—small issues like tiny leaks or air bubbles can become big headaches if left alone.
Simple Maintenance Tips for Homeowners
Taking care of your pool’s plumbing doesn’t have to steal your weekends. Here are some straightforward actions:
- Clear the skimmer and pump baskets weekly to stop debris backing up the lines.
- Check around valves, pipe joints, and equipment pads for slow leaks or wet spots every so often.
- Flush the plumbing lines with fresh water before starting the swimming season or after a messy storm.
- Keep an eye on water pressure or flow—if it drops, something’s off and should be inspected.
- Schedule a regular inspection of your fittings and hoses for cracks or sun damage, especially after summer.
Even if you’re not handy with the tools, spotting problems early means less stress down the track and a pool that stays swim-ready for longer.
When to Call a Swimming Pool Professional
Not everything can be sorted by reaching for the toolkit. Here are some examples of when it’s best to get a qualified pool plumber involved:
- You can’t track down the cause of low water pressure or persistent leaks.
- Major repairs are needed to buried pipes, equipment, or main lines.
- There’s evidence of electrical problems around the pool equipment area.
- Water turns cloudy or green even with working filters—could point to hidden pipe issues.
If you’re ever in doubt, remember: costs stack up fast if a minor plumbing mistake leads to flooding or structural damage.
| Problem | Tackle Yourself | Get a Professional |
|---|---|---|
| Skimmer basket jam | ✓ | |
| Big underground leak | ✓ | |
| Pump not priming | ✓ | |
| Broken main valve | ✓ |
Stay proactive and your pool’s plumbing will keep everything ticking along smoothly, all year round.
Upgrading and Modifying Your Pool Plumbing Diagram
Looking to get more from your pool? Modern Aussie pools can do more than just keep you cool. Tweaking your plumbing layout is the secret to adding new features, better controls, and even saving on power bills.
Adding Features Like Waterfalls or Spas
Throwing in extras like a waterfall, spa or even bubblers means you’ll need to rethink your plumbing. Here’s what generally goes into it:
- Install extra supply and return lines for separate water features.
- New valves help control which area gets water at what time.
- Sometimes, you’ll need another pump just for the feature—otherwise the main pool pump can lose pressure.
- Don’t forget electrical work (especially for spas!) and make sure everything’s waterproof.
Before you start adding anything fancy, map it out on your plumbing diagram so you can see exactly where everything connects. A bit of time with a pencil now will save serious hassle down the line.
Integrating Smart Pool Systems
Switching to a smart pool setup sounds high-tech, but at the plumbing level, it’s mostly about automation:
- Replace manual valves with motorised versions (so your system can redirect water from the touch of an app).
- Add flow meters and pressure sensors—these send info to your phone or control panel.
- Set up the system for remote monitoring and alerts if something’s off (like low flow).
Aussie homeowners are finding these updates make it way less stressful to keep things running. If you ever need spare parts, the range of essential pool spare parts available locally is massive now, and many work with automated systems.
Adapting for Energy Efficiency and Sustainability
Rising power bills are the number one reason people change up their pool plumbing. A few smart swaps can make a big dent:
- Switch to variable-speed pumps—these only use as much power as needed.
- Install solar heaters, or at least run heater plumbing so you can add panels later.
- Upgrade to larger, smoother pipes or energy-saving fittings to reduce resistance.
- Consider a pool cover system that automates based on temperature, cutting down on evaporation and heating costs.
Here’s a quick look at how much you could save with some common upgrades:
| Upgrade Type | Potential Power Saving |
|---|---|
| Variable-speed pump | Up to 80% |
| Solar heating vs. electric | 50-70% on heating |
| Efficient plumbing layout | 10-15% |
Upgrading your plumbing might seem full-on up front, but the yearly savings really add up—and you get a more fun, easier-to-manage pool. No matter what changes you’re making, always update your plumbing diagram, and get a pro to double-check before you break out the shovel.
Wrapping Up: Making Sense of Your Pool Plumbing
So, there you have it. Understanding your swimming pool plumbing might seem a bit much at first, but once you get your head around the basics, it all starts to click. Knowing what each pipe and valve does can save you a lot of headaches down the track, especially when something goes wrong. If you’re ever unsure, don’t be afraid to ask your installer or check out the guides and videos that come with your pool. Most of the time, a quick look at your diagram will answer your questions. And remember, regular checks and a bit of maintenance go a long way. At the end of the day, the more you know about your pool’s plumbing, the easier it’ll be to keep things running smoothly – and you’ll spend less time fixing problems and more time enjoying a swim.
Frequently Asked Questions
What are the main parts of a swimming pool plumbing system?
A typical pool plumbing system includes pipes, pumps, filters, valves, and sometimes heaters and chlorinators. Pipes move water in and out of the pool, while the pump keeps the water flowing. Filters clean the water, and valves help control where the water goes.
How do I know if my pool plumbing is set up correctly?
Look at your pool plumbing diagram or ask your installer to show you. Water should flow smoothly from the pool to the pump, through the filter, and back to the pool. If you see leaks, hear strange noises, or notice weak water flow, there may be a problem.
Do I need special plumbing for a fibreglass pool compared to a concrete pool?
Yes, there can be differences. Fibreglass pools often come with pre-made fittings, while concrete pools are more custom-built. The plumbing layout might change based on the pool type, but the main parts—like pumps and filters—are usually the same.
Are there rules about pool plumbing in Australia?
Yes, Australia has rules to keep pools safe and healthy. These rules cover things like backflow prevention to stop dirty water from getting into your home’s water supply. Always check with your local council or a pool builder to make sure your setup follows the law.
How often should I check or clean my pool’s plumbing?
It’s a good idea to check your pool plumbing every month for leaks or clogs. Clean your filter as often as the manufacturer suggests, usually every few weeks. If you notice anything strange, like cloudy water or low pressure, check your pipes and equipment right away.
When should I call a professional for pool plumbing help?
Call a professional if you find leaks you can’t fix, if your pump isn’t working, or if you’re planning to add new features like a spa or waterfall. It’s better to get expert help than risk making the problem worse.