Owning a pool is great, but keeping it clean can feel like a chore. You’ve got leaves, dust, and all sorts of bits settling on the bottom. Luckily, getting a clean pool with vacuum is pretty straightforward. This guide will walk you through the simple steps, from the gear you need to the best way to move that vacuum head. We’ll even touch on when a robot cleaner might be a good idea. Let’s get your pool sparkling!
Key Takeaways
- Regular vacuuming is vital for keeping your pool water balanced and preventing algae growth.
- You’ll need a vacuum head, telescopic pole, vacuum hose, and a skimmer plate for manual vacuuming.
- Always prime your vacuum hose by running water through it before attaching it to the skimmer.
- Move the vacuum head slowly and steadily, overlapping your passes for a thorough clean.
- Consider a robotic pool cleaner for automated maintenance between manual vacuuming sessions.
Why Regular Vacuuming Is Essential For A Clean Pool
Even with a good filter, your pool naturally collects bits and pieces. Leaves, bugs, dust – they all eventually sink to the bottom. Skimming gets the floating stuff, but for what’s settled down below, you really need to vacuum. It’s not just about looks, though. Doing this regularly makes a big difference to your pool’s overall health and how pleasant it is to swim in.
Protecting Water Balance Through Vacuuming
When organic bits like leaves and grass start to break down at the bottom of your pool, they release things like phosphates. These can mess with your water chemistry, throwing off your pH and chlorine levels. If your water balance goes out of whack, it takes more effort and chemicals to get it back to normal. Vacuuming removes this gunk before it has a chance to decompose and cause problems.
Preventing Algae And Stains With Regular Cleans
Dirt and tiny algae spores love to cling to pool surfaces, especially the bottom. If you leave them there, they can start to form stubborn stains or create slippery patches that are a pain to get rid of. Regular vacuuming helps lift these particles away, stopping them from taking hold and making your pool surfaces look grubby or stained.
Reducing Filter Strain By Removing Debris
Think of your pool filter like your vacuum cleaner bag – it can only hold so much. When debris sinks to the bottom, it eventually gets circulated towards your filter. By vacuuming it up first, you’re taking the load off your filter system. This means you won’t have to backwash or clean your filter cartridges as often, which can help your filtration equipment last longer.
Improving Swimmer Comfort With A Clean Pool
Nobody enjoys stepping into the pool and feeling grit or slime under their feet. A pool that’s been properly vacuumed just feels nicer. The water looks clearer, and the bottom is smooth and clean. It makes the whole swimming experience much more enjoyable and inviting for everyone.
Keeping up with vacuuming is one of those simple tasks that really pays off. It’s a straightforward way to keep your pool looking good and running smoothly, without needing constant attention.
Essential Tools For A Sparkling Clean Pool With Vacuum
Alright, so you’re ready to get your pool looking like a postcard, but you can’t do it with just your hands, right? You’ll need a few bits and bobs to get the job done properly. Think of it like getting ready for a big cook-up; you wouldn’t try to chop veggies with a butter knife, would you?
Manual Vacuuming Equipment Essentials
First up, the core gear for manual vacuuming. You absolutely need:
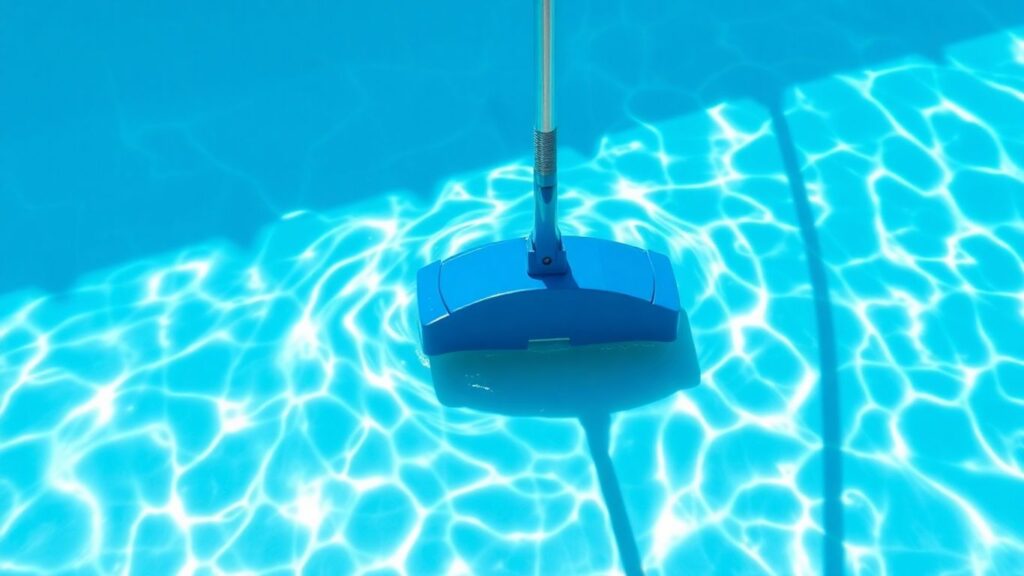
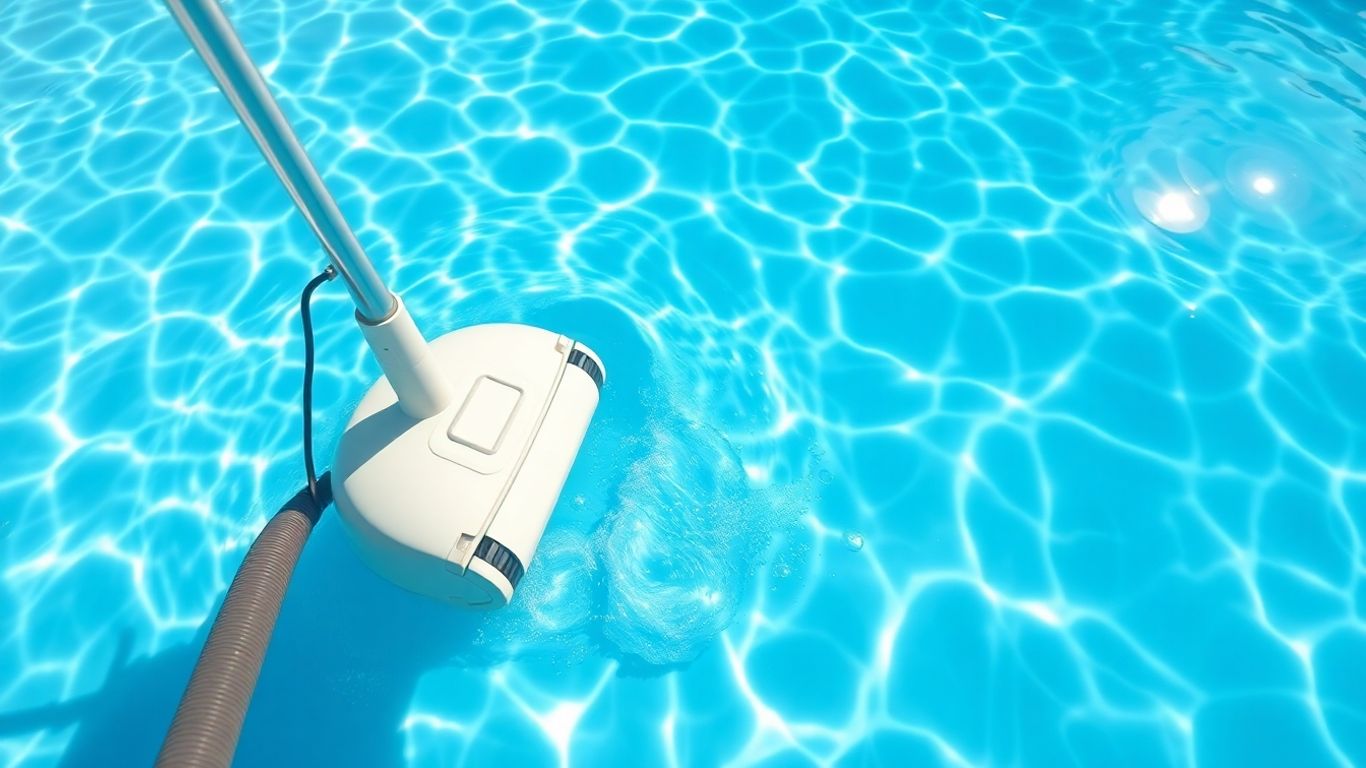
- Vacuum Head: This is the bit that actually does the sucking up of gunk off your pool floor. They come in different types, so grab one suited for your pool’s surface – whether it’s vinyl, fibreglass, or concrete. Getting the right head makes a huge difference.
- Telescopic Pole: This is your extension cord, basically. It lets you reach all the way to the far corners of the pool without you having to jump in. Make sure it’s long enough to comfortably reach the middle of your pool.
- Vacuum Hose: This long, bendy hose connects your vacuum head to the pool’s suction system, usually through the skimmer. It needs to be long enough to reach the deepest part of your pool from the skimmer.
- Skimmer Plate (or Vacuum Plate): This handy little gadget fits right over your skimmer basket. It has a spot to plug in your vacuum hose, meaning you don’t have to pull the basket out every time. It’s a small thing, but it saves a lot of hassle.
Helpful Extras For Enhanced Cleaning
While the above is the bare minimum, a couple of extra tools can make your life a lot easier and your pool a lot cleaner:
- Pool Brush: Before you start vacuuming, giving the walls and floor a quick brush loosens up any dirt or algae that’s stuck fast. This way, the vacuum can actually suck it up instead of just pushing it around.
- Leaf Rake or Skimmer Net: If you’ve got a lot of leaves or bigger bits of debris floating around, scooping them out with a net first stops your vacuum hose from getting clogged up. It’s a bit like clearing the table before you start washing dishes.
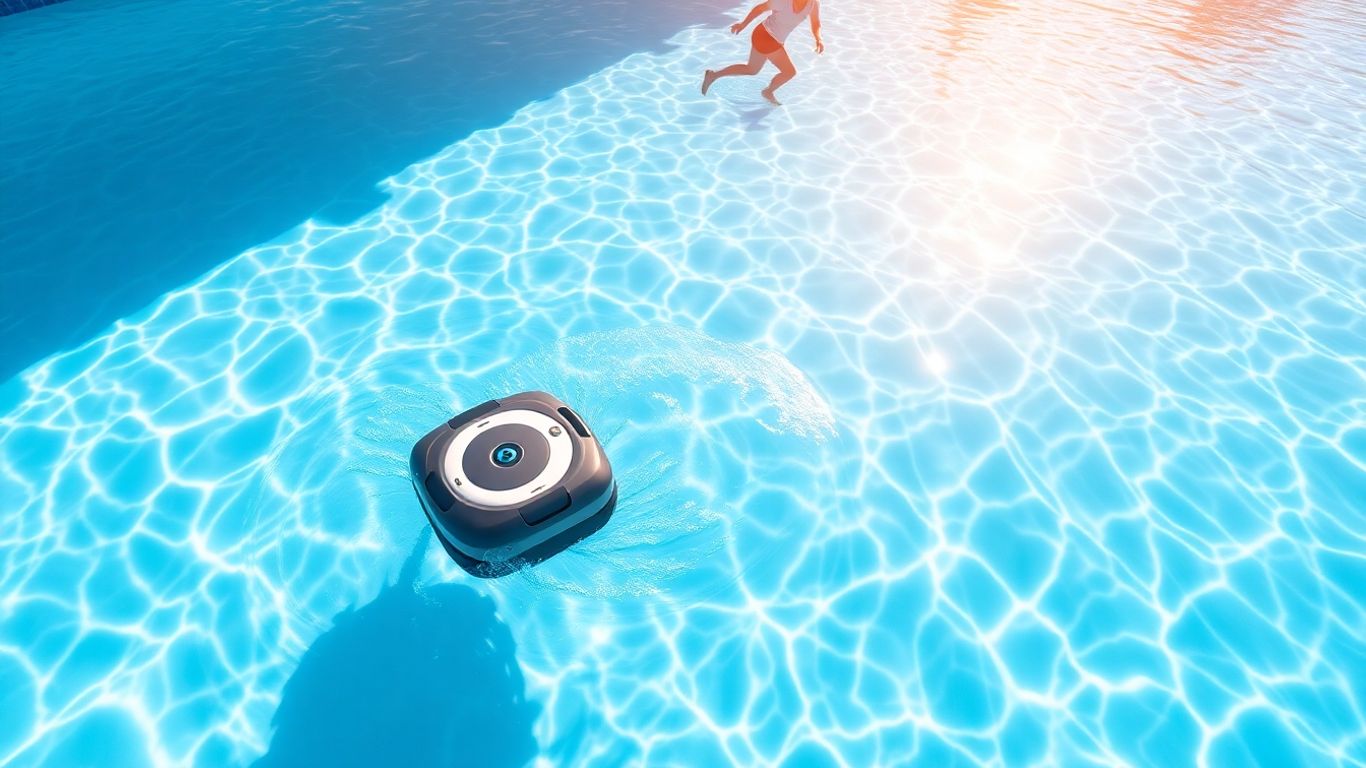
Considering A Robotic Pool Cleaner Upgrade
Now, if you’re thinking about cutting down on the time you spend wrestling with hoses and poles, a robotic pool cleaner might be worth a look. These things are pretty clever. They just get chucked in the pool and do their own thing, cleaning the floor, and sometimes even the walls and waterline, all by themselves. They’re great for keeping on top of the day-to-day mess, so when you do your weekly manual vacuum, it’s a much quicker job. Think of it as a little helper that keeps things tidy between your bigger cleans. For example, a unit like the Mammotion SPINO E1 can handle regular debris removal automatically, making your manual sessions faster and easier. It’s not a replacement for a deep clean, but it’s a smart addition to your pool care routine. Understanding your pool’s plumbing system is also key to ensuring your equipment runs smoothly. Check out pool plumbing basics.
Having the right gear makes all the difference. It’s not just about having the tools, but having the right tools for the job. It turns a chore into something much more manageable, and honestly, a bit more satisfying when you see the results.
Step-By-Step Guide To Manual Pool Vacuuming
Alright, let’s get down to business with the manual pool vacuum. It might seem a bit old-school, but honestly, it’s a solid way to get your pool floor looking spick and span. Here’s how to tackle it, step-by-step.
Preparing Your Pool And Equipment For Vacuuming
First things first, you want to get everything ready. Think of it like prepping your tools before a big DIY project. You don’t want to be halfway through and realise you’ve forgotten something important.
- Skim the surface: Grab a leaf rake or a skimmer net and get rid of any floating gunk like leaves, bugs, or petals. This stops them from getting sucked up and clogging your vacuum hose.
- Brush the walls and steps: Give the pool walls, steps, and any other surfaces a good brush. This loosens up any dirt or grime that’s settled, making it easier for the vacuum to pick it all up.
- Check your filter: Have a look at your filter pressure gauge. If it’s higher than usual, it’s time to clean or backwash it. A clean filter means better suction for your vacuum.
Assembling Your Pool Vacuum Correctly
Now for putting the gear together. It’s pretty straightforward, but getting it right makes all the difference.
- Attach the vacuum head to the pole: Make sure it’s on there securely. You don’t want it falling off halfway through.
- Connect the hose to the vacuum head: One end of your long, flexible vacuum hose goes onto the vacuum head. Give it a good push to make sure it’s snug.
- Prime the hose: This is a really important step to get rid of air. Submerge the vacuum head and the hose completely in the pool water. Let the hose fill up until you don’t see any more air bubbles coming out of the vacuum head. You can also try holding the open end of the hose near a return jet to push water through it.
Lowering The Vacuum Head Into The Pool
Once everything’s assembled and primed, it’s time to get the vacuum head into the water.
Carefully lower the vacuum head, with the pole and hose attached, into the pool. Make sure the head sits flat on the pool floor. If you’re having trouble with the hose staying connected, a hose clamp can be a lifesaver.
Starting Your Vacuuming In The Shallow End
Now for the actual vacuuming. The best place to start is usually the shallow end.
Begin moving the vacuum head slowly and steadily across the pool floor. Think of it like mowing the lawn – try to do straight passes and overlap each one a little bit. This way, you won’t miss any spots. Moving too fast will just stir up the dirt instead of sucking it up. If the water gets too cloudy to see, just stop for a bit and let it settle. If you lose suction, pull the hose out of the skimmer, prime it again by holding it near a return jet, and then reattach it. When you’re done, remember to disconnect everything and return your filter settings to normal. If you’ve got a sand filter, give it a backwash after you’re finished.
Optimising Your Pool Vacuuming Technique
Alright, so you’ve got your gear ready and you’re about to dive into vacuuming. But how do you actually do it well? It’s not just about dragging the vacuum around; there’s a bit of a knack to it.
Attaching the Hose to the Skimmer Plate
First things first, you need to connect your vacuum hose to the pool’s suction. The easiest way is usually through the skimmer. You’ll want to use a skimmer plate, which is basically a little adapter that fits over your skimmer basket. This lets you hook up the hose without having to remove the basket entirely. Make sure the hose is fully submerged and the pump is running before you connect it. You don’t want air getting into the system, as that’ll kill your suction.
Moving the Vacuum Head Slowly and Steadily
This is probably the most important part. You need to move the vacuum head slowly and steadily across the pool floor. Think of it like mowing a lawn, but much, much slower. If you go too fast, you’ll just stir up the debris instead of sucking it up, and it’ll end up back in the water. Aim for a pace where you can see the dirt disappearing into the hose.
Overlapping Passes for Thorough Cleaning
Don’t just do one straight pass down the middle. You need to overlap your strokes. Imagine you’re painting a wall; you overlap each stroke a bit to make sure you don’t miss any spots. Do the same with your vacuum. Work your way across the pool, making sure each pass slightly overlaps the one before it. This way, you won’t leave any patches of dirt behind.
Troubleshooting Suction Issues During Vacuuming
Sometimes, you’ll notice your vacuum isn’t sucking up debris like it should. This usually means there’s an air leak somewhere or your filter is clogged. Check that the hose is properly connected at both ends and that there are no kinks. If you’ve got a lot of fine silt, you might need a vacuum head with brushes instead of wheels to get better contact with the pool floor. Also, remember to check your filter’s pressure gauge; if it’s high, it’s time for a clean or backwash.
A common mistake is rushing the process. Patience is key here. Moving too quickly is the main reason people end up with cloudy water after vacuuming, even though they thought they were cleaning it.
Here’s a quick rundown of what to do if suction drops:
- Check the skimmer basket: Is it full of leaves or debris? Empty it.
- Inspect the vacuum hose: Look for any holes or loose connections.
- Examine the filter: Is the pressure gauge reading high? It might need cleaning.
- Verify water level: Ensure the water is high enough to cover the skimmer opening.
Pro Tips And Common Mistakes When Vacuuming
Alright, so you’ve got your gear, you know the steps, but let’s talk about how to actually make vacuuming a breeze and avoid those annoying little hiccups. It’s not rocket science, but a few smart moves can save you a heap of time and frustration.
Vacuuming Frequently For Best Results
Honestly, the best way to keep your pool looking good is to just get in there regularly. Aim for at least once a week during the busy swimming season. If you’ve had a big storm or a party where everyone and their dog jumped in, give it another quick vacuum. It’s way easier to pick up a bit of dirt often than to tackle a massive mess later.
Brushing Before Vacuuming For Efficiency
This is a big one, and something people often skip. Before you even think about the vacuum, grab your pool brush. Give the walls, steps, and any corners a good scrub. This loosens up any gunk, algae, or settled dust that’s clinging on. Once it’s all stirred up and settles on the floor, your vacuum can grab it much more easily. Think of it as prepping the battlefield for your vacuum cleaner. It really makes a difference, trust me.
Avoiding Vacuuming Too Quickly
I know, I know, you want to get it done and jump in the pool. But if you zoom around like a madman, you’re just going to stir up all that lovely debris you’re trying to collect. The water gets cloudy, and the dirt just gets redistributed. Move the vacuum head slowly and steadily, like you’re mowing a lawn, making sure each pass overlaps the last one a bit. This way, you’re actually sucking up the gunk, not just pushing it around.
Properly Storing Your Vacuuming Gear
This might seem minor, but it’s important for keeping your gear in good nick. Once you’re done, disconnect everything, give the hose, head, and pole a good rinse with fresh water. This gets rid of any chlorine or pool chemicals that can degrade the plastic and rubber over time. Then, let it all dry out a bit in a shady spot before you coil up the hose and store the pole. It’ll last a lot longer this way, saving you money in the long run. You can find good storage solutions for your pool equipment online.
A common mistake people make is not priming the vacuum hose properly. If you don’t get all the air out, you’ll have next to no suction, and the whole process becomes a frustrating exercise in futility. Make sure you submerge the hose completely, letting water fill it all the way through before connecting it to the skimmer.
When To Utilise A Robotic Pool Cleaner
Manual vacuuming is great for a thorough clean, but let’s be honest, sometimes life gets in the way, and getting the vacuum out feels like a chore. That’s where a robotic pool cleaner really shines. These little helpers can take over the grunt work, keeping your pool looking tip-top with minimal fuss from you. They’re particularly handy if you’ve got a larger pool or just want to free up your weekends.
Benefits Of Robotic Pool Cleaners
Robotic cleaners are pretty much set-and-forget. You chuck them in, turn them on, and they get on with it. They’re designed to scrub and suck up debris, leaving your pool floor and walls looking much cleaner. Plus, they often use less energy than running your main pool pump for extended periods, which is a nice bonus for the electricity bill.
- Time-saving automation: They clean on a schedule, so you don’t have to remember to do it.
- Consistent results: Regular cleaning means less chance for dirt and algae to settle in.
- Reduced filter strain: By picking up debris directly, they lessen the load on your main pool filter.
Robotic Cleaners As A Complement To Manual Vacuuming
Think of a robotic cleaner as your trusty sidekick, not a replacement for everything. While they do a fantastic job of keeping on top of daily or weekly dirt, they don’t quite replace that deep-clean feeling you get from a manual vacuum. It’s a good idea to still give your pool a good manual vacuum now and then, especially if you’ve got stubborn spots or a lot of debris after a big storm. Combining both methods means your pool stays cleaner for longer, with less effort from you. It’s a smart way to manage your pool maintenance.
Keeping your pool clean is all about consistency. A robotic cleaner helps maintain that consistency between your more hands-on cleaning sessions, making the whole process much more manageable.
Choosing The Right Robotic Cleaner
When you’re looking at robotic cleaners, there are a few things to consider. You’ll want one that’s suited to your pool’s size and shape. Some are better for specific surfaces, like tile or vinyl. Also, check out how much debris they can hold and how easy they are to clean out. For a good all-rounder, something like the Mammotion SPINO E1 is often recommended for its ease of use and reliability. It’s a solid choice for keeping your pool in good nick without too much hassle. Remember to check out reviews and compare features to find the best fit for your needs. A little research goes a long way to ensuring you get a cleaner that actually makes your life easier and keeps your pool looking its best, perhaps even reducing the need for frequent saltwater pool maintenance.
Maintaining Your Clean Pool With Vacuuming
So, you’ve done the vacuuming, and the pool looks a treat. But what happens next? It’s not just about the vacuuming itself; a few simple steps afterwards keep things running smoothly. First off, after you’ve finished sucking up all that gunk, make sure to turn off the pump. Then, carefully pull the hose, vacuum head, and pole out of the water. Give all your gear a good rinse with fresh water – this stops any pool chemicals from damaging your equipment over time. Don’t forget to switch your filter valve back to the ‘Filter’ setting if you had it on ‘Waste’ or ‘Backwash’ during the process.
It’s also a good idea to check your water chemistry after vacuuming. Sometimes, especially if you vacuumed a lot of debris or used the ‘Waste’ setting, the levels might need a little tweak. Keeping on top of this means your pool stays balanced and pleasant for swimming.
Regularly rinsing your vacuum equipment after each use is a small step that makes a big difference in how long your gear lasts. It prevents the build-up of harsh chemicals that can degrade hoses and heads over time.
Here’s a quick rundown of what to do post-vacuum:
- Turn off the pool pump.
- Remove all vacuuming equipment from the pool.
- Rinse equipment thoroughly with fresh water.
- Return the filter valve to the ‘Filter’ setting.
- Test and adjust water balance as needed.
If you’re finding that you’re constantly battling debris or your pool seems to get dirty again really quickly after vacuuming, it might be time to look at your overall maintenance schedule. Sometimes, a robotic pool cleaner can be a real lifesaver for keeping things tidy between your manual vacuuming sessions. Something like the Mammotion SPINO E1 can handle the daily grind, meaning your manual vacuuming is more about the deeper cleans. It’s a great way to keep your pool looking its best without all the constant effort. If you notice persistent issues like cloudy water that doesn’t clear up, or if your filter seems to be working overtime, it might be time to get a professional to take a look. They can spot problems you might miss and help get your pool back on track.
Wrapping Up Your Pool Cleaning
So, there you have it. Keeping your pool looking its best doesn’t have to be a massive chore. Once you get the hang of vacuuming, it really just becomes another part of your routine, like mowing the lawn or taking out the bins. Whether you’re doing it manually or have a robotic helper doing some of the heavy lifting, a clean pool is definitely achievable. Just remember to be consistent, take your time with the vacuum head, and you’ll be enjoying that clear, inviting water before you know it. Happy swimming!
Frequently Asked Questions
How often should I give my pool a good vacuum?
It’s a good idea to vacuum your pool at least once a week when you’re using it a lot. If there’s been a big storm or a party with lots of people, give it a vacuum straight after to keep the water clear.
Should I vacuum my pool on ‘Filter’ or ‘Waste’ mode?
For light dirt, stick to ‘Filter’ mode so the stuff goes through your filter. If there’s a lot of gunk, like algae or heavy debris, use ‘Waste’ mode. This lets the dirt go straight out without clogging up your filter.
Is it better to vacuum with the pool pump running or turned off?
Always keep the pool pump on when you’re vacuuming. You need the pump to create the suction that sucks up the dirt and leaves from the bottom of your pool.
My vacuum keeps losing suction, what’s going on?
If your vacuum stops sucking, it usually means air has gotten into the hose. Try taking the hose out of the skimmer, holding it near a return jet until the bubbles stop, and then put it back in the skimmer. Make sure the hose stays underwater.
Is an automatic pool cleaner worth the money?
For most people, yes! If you value your time, an automatic cleaner can save you hours each month. It’s a great option if you have a big pool or just want to make cleaning easier.
What are the warning signs that my pool needs urgent attention?
Keep an eye out for cloudy water, visible dirt on the pool floor, or if the walls feel slimy – that’s a sign of early algae. If you notice a strong chemical smell, your pool is definitely telling you it needs some help right away.